
|
Sewing a 2-Layer Cape: Okay, so you wan to sew a really nice dramatic cape for your figure, like the kind you've seen Charlee Flatt make. You want it to have a different color lining, a nice top-stitch, and to be very posable, and you want the shoulders to be dramatic.... Okay here's how ya do it. Materials: - Fabric
(of two different colors, one for the inner layer, one for the outer).
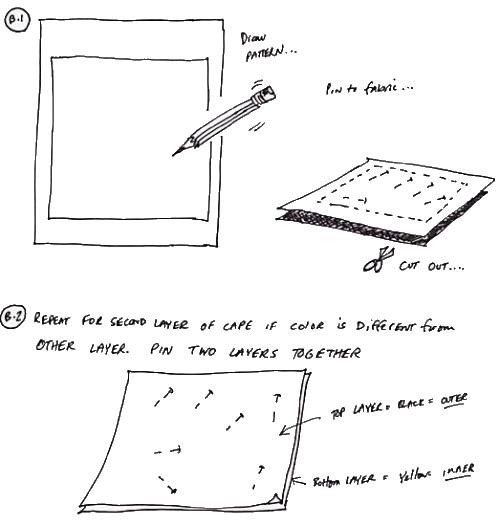
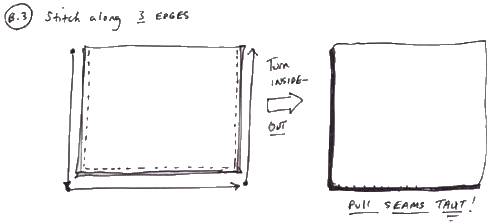
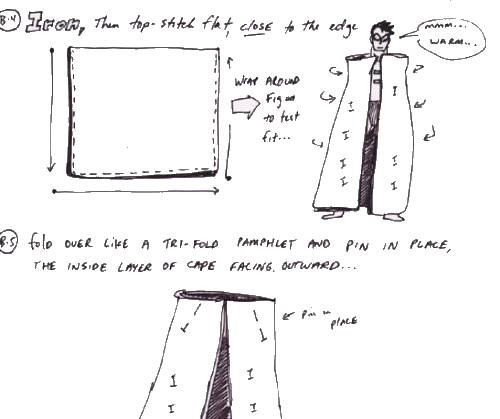
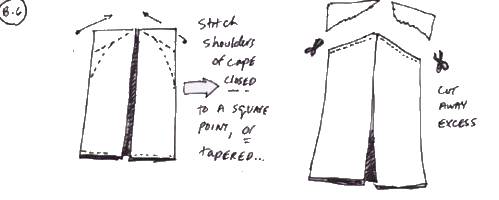
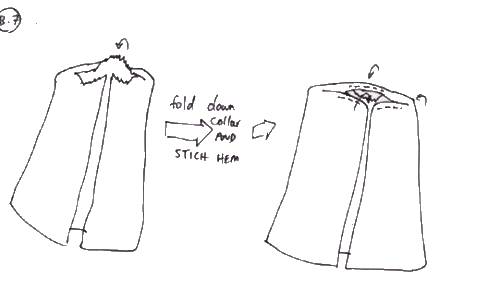
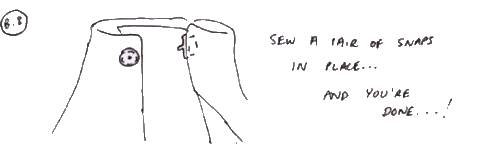
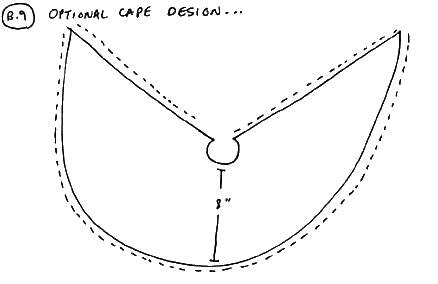
Start by drawing yourself a basic rectangular pattern. Pin this to both layers of fabric and cut out along the lines (fig. B.1-B.2). Stitch along three of the edges. Now turn your garment inside out and pull the seams taut! (fig. B.3). Now you are going to do the top stitch. One mistake alot of people make with this is not pulling the seams taut enough and stitching too far away from the edge of the fabric. This causes material to bunch up near the edge and weighs the cape down. So make sure you stitch your top stitch within a 1/8" of the cape's edge. Load the outer fabric color thread (i.e. black) in the top thread spool of the machine, and load the other color (i.e. yellow) in the bobbin thread compartment. Sew the top stitch with the outer side of the cape facing you. This way, when you're done, on one side of the cape only the black thread will show for example, and on the other side, only the yellow thread will show. If the tensions are screwed up on your sewing machine, some of the wrong color thread may get pulled through to the other side, messing up the look. So, to avoid this problem all together, I top-stitch with a white thread, then color the stitch afterwards using fabric markers in the desired shade. Okay, so you've done your top-stitch (fig. B.4). Fold the cape around the prospective figure (in this case, my custom Robin) to get an idea of how much extra fabric you have. Take the figure away, and fold the cape into threes, with the I-sides facing you. Do this by having the two edge of the cape meet and then press toward the back of the cape. Pin the shoulders in place (fig. B.5). Now sew the shoulders closed on an angle out to the edge of the cape (fig. B.6) and trim away the excess. Note: You can sew the shoulders so that the edges of the shoulder will be square , giving your figure a very broad-shouldered look, or they can taper out to be more graceful, such as what I did with my Dr. Strange. Now fold down the ragged edges of the collar of the cape and stitch the hem of them (fig. B.7). Sew on a couple of snaps (fig. B.8) for your cape and you're all done! In either case, the advantage of this cape, aside from dramatic appearance, is that two layers of fabric are very heavy, but every crease you sew into the cape gives a possible support system for posing the cape (unlike Charlee Flatt, I don't like to sew miniature wires into the fabric edges. Just a personal thing). The straight stitch at the shoulders serves as a sort of cape infrastructure (for lack of a better term) that allows you to pose the cape in many different ways, all of which give the figure that little extra something special (attention Scott Metzger! You were asking me how to make 2-layer capes less heavy and more posable-- here ya go!). One optional cape pattern I've also used (such as on my Modern Batman) is the circular 2-layer cape. This is basically a semi-circle whose radius is 8". See the pattern in (fig. B.9). This kind of cape is particularly effective for characters with large billowing capes, i.e. Batman, Spectre, Cloak (of cloak and dagger), Phantom Stranger..... All of the rest of the instructions are the same. Good luck!
|


| CUSTOMEGO | GALLERIES | HOME | FAQ | FORUMS | SEARCH | CONTACT | LINKS |