- Okay. So she's all alone on her own transparent layer. While we are
at it let's adjust her colors and contrast. She seems a little washed out.
You could use BRIGHTNESS/CONTRAST adjustment, but you will find that LEVELS
works a little better. By adjusting the sliders controlling light, dark
and midtones we can get something that looks right. Levels is just invaluable
and something worth investigating.
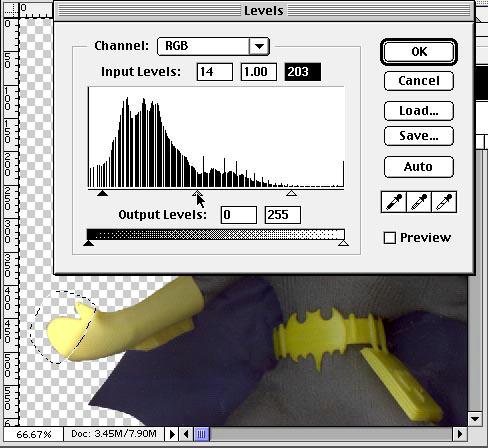
- Note that in this case I have a selection around her hand. Because
she was laid down on a scanner in this particular pose, the light is very
strong on those points where she was directly touching the glass. I want
to brighten her up overall and adjust her contrast, but since the gloves
are already under such strong light they will get totally washed out when
I pump the rest of the image up. So I took the lasso tool and did a rough
select of the brightest area at the end of the glove, feathered the selection
by five or six points, then inverted the selection so the glove won't be
affected by the levels adjustment.
-
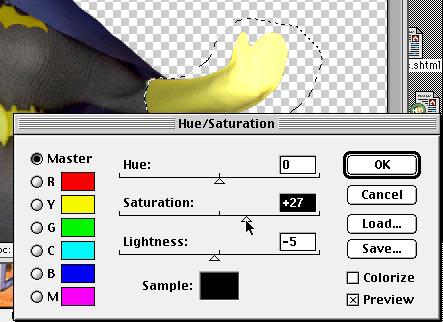
- I didn't need to adjust the levels too much. Just enough to give some
stronger contrast. After that the gloves weren't quite YELLOW enough for
me. With the Lasso I selected the glove and used the HUE/SATURATION feature
to get a more vivid SATURATED yellow. Similarly, I might have done this
to brighten up a faded cape or desaturate a face that had become too pink.
NEXT