Backer Card Creating by Chad Gordy
Think back to the days of strolling through the toy aisle at K-Mart. Remember seeing that Spiderman, Superman, or Batman on the hanger and begging Mommy to buy it? Remember getting through the checkout line and into the car, only to tear into your newly acquired action figure?
With the aid of this tutorial and todays affordable printing means, you can now create reproductions of that beloved packaging to display your treasured Megos.
All youll need are a couple tools, a little attention to detail, and most of all- artwork.
The Tools
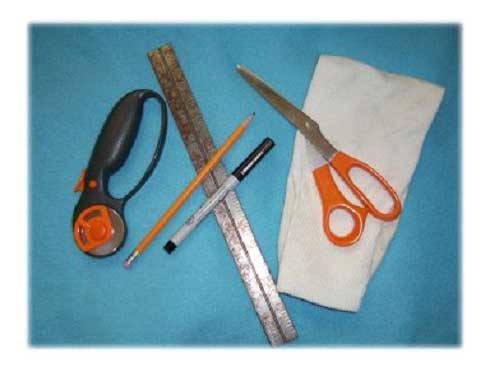
For the method I am about to describe, I have used tools pictured above. A good, sharp rotary cutter, a metal straight edge, pen & pencil, scissors, and a good old fashioned cotton tube sock.
For advanced card creativity, I would also use the following; hole punch, corner rounder, hammer, and a custom punch set.
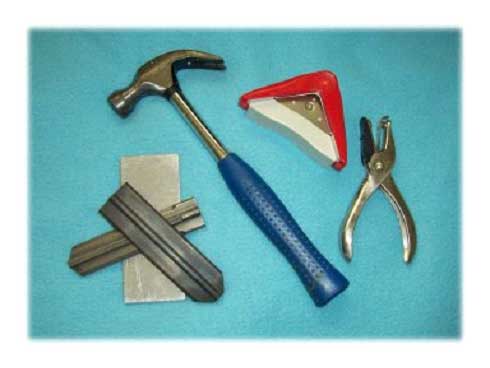
The advanced tools are not required, but enhance the level of your creation. A corner rounder provides a consistent edge, but if you have a good eye, you can accomplish the same with scissors. Most collectors desire their packaging to be un-punched, so you would not need a hole punch. Many of our Mego collectors purchase the re-sealable clamshell cases to house their artwork. Lastly, the custom punch set. I located a company that made them per my specifications. These punches allow me to create the look and feel that the backer card is in a factory, un-punched state. Pictured above are two different sizes; one size for Trek Alien style cards, the other for vintage Star Wars cards.
If you are comfortable with the basic tools, then lets move forward. The method I will describe in this tutorial relies on either poster board or chipboard. In my experiments, not all white poster board is created equal. Some brands have a thick wax coating, where other brands are much less; I prefer the lesser. The lesser coating allows for greater, more durable adhesion of the artwork. Chipboard is the material of choice. It has no wax coating and is cardboard brown, which will give your backer card the ultimate factory look. Both board types can be found at your local hobby shop.
The Artwork Beginning
The bottom line when it comes to making attractive artwork is resolution. All artwork offered within this tutorial will be in 300 DPI. Any less, and your printed results will look fuzzy; any greater and it is overkill.
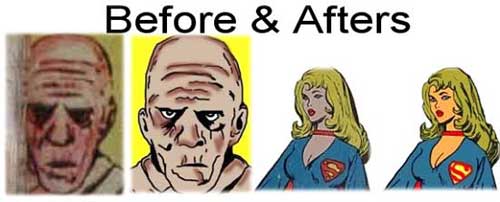
As this tutorial provides, the hard part is already done, but I will describe what it took to create these works of art. I use Paint Shop Pro for all my artwork. Every artist has their preference, so if you feel more comfortable with another product, use what you like. None of the WGSH card styles provided with this tutorial were derived from 1:1 scans. The only artwork available, when I began, was low-res, 72 DPI images found on the Internet. Later, as selling on eBay became popular; I was able to see the original cards a bit more up close and personal. I never had the money to buy a mint Mego action figure and furthermore, didnt know anyone who owned one so I could examine it.
For almost a year, I collected image after image. It was as if I were assembling a puzzle. Each new image I would come across would show me a bit more of the card; whether it was a face, a certain line of text or even the logos. I was constantly refining the basic card design. It wasnt until after that years time, that I was comfortable with what I had re-drawn that I got serious about making cards.
I started out using my home inkjet printer, photo paper, white poster board, and spray adhesive. My goodness, was it time consuming and messy. But, it was a start. Id print out the front and backsides, go outside to a work table, spray the poster board with the glue and apply the artwork. It took hours for the glue to set before I could trim the card and even after all the hard work, the glue was not long-lasting. After a while, the photo paper would begin to separate from the poster board, which is quite an undesirable effect.
A few more months of refining my artwork and I approached a few local print shops to start picking their brain. Every single one of them looked at me and the sample card I made at home and just scratched their head. First, they were astonished at the result of a homemade backer card. They thought the idea was ingenious; photo paper, poster board and glue. However ingenious they thought it was, they were mostly unhelpful in finding another solution. I finally came across a local shop who seemed more willing to accept the challenge. After trial an error, material after material, color palette after color palette, we did it! We discovered a particular brand of no-release, semi-gloss bonding paper that we could run through their color laser copier. It was the original idea of photo paper and glue, just already done for me. I began experimenting with the application to various brands of poster board. That is when I discovered the wax coating formula varied from brand to brand. If the coating was too heavy, I could pull my artwork right back off the poster board. After a few more months of experimentation, I finally landed on the right board. After having a few months of successful card creating, something changed. I was having a terrible time getting the material to cooperate. It was wrinkling, and almost every card I tried to make, ruined during construction. That is when I discovered humidity. The humid temperature in my house was wreaking havoc with the label stock. If relative humidity reached anything higher than 58 %; forget about making any cards using this method. You will only frustrate yourself to the end of the earth and ruin a great deal of product if you rush it.
Making the Card!
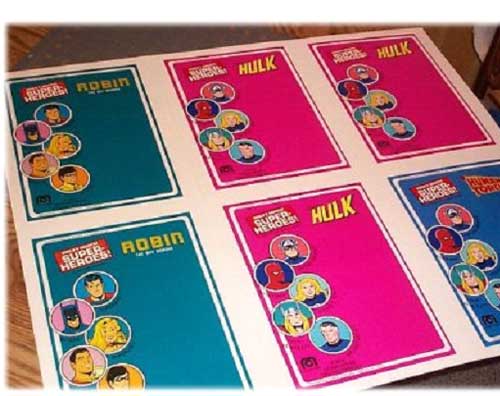
There is no better way to further explain my card making process, except to just .show you!
The Bubble
All of the Mego style bubbles are obtained from TJ'sToys . It was another fine benefit of my process that allowed my to come up with the self-adhesive style bubble. After the artwork was applied to the poster board, I would have this wax paper that ended up in the trash. After some experimentation, I found Scotch made a brand of permanent double-sided tape. Its width was perfect for Mego bubbles. I would apply the tape to the bubbles and then take strips of the waste wax paper and apply them. I would then trim off the excess with scissors and walla, it was ready to be peeled off and applied. This method comes in handy if you are dealing with a Mego figure whom has a cape, or if you are trying to achieve that particular pose.