
Rooting Hair on a Vinyl Head by Bryan Bossart
Tools you'll need
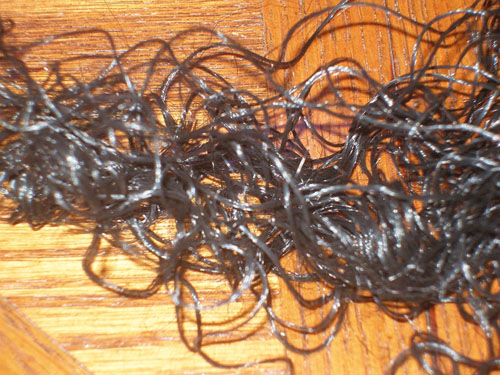
-Candle, -Pair of sharp scissors, -Needle-nose pliers, -Fine tooth comb (baby or pet comb works well), -Needle with large eye-hole, -Doll or wig hair, -Head.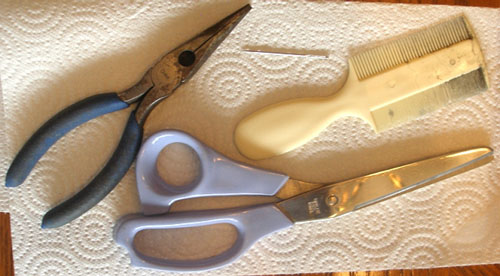
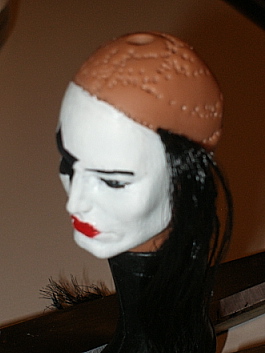
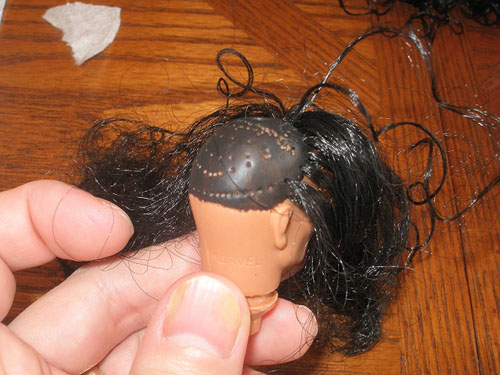
Step 1. Remove hair from existing head.
Cut the hair as close to the head as possible. Cuticle scissors work well. Cut a small slit about ¼ to ½ up the back of the next plug. Using a flathead screwdriver scrape original hair plugs out of the head by going up thru the newly elongated neck hole. The vinyl is fairly resilient, so dont be afraid to put a little muscle into it. Make sure all hair is removed from inside the head.
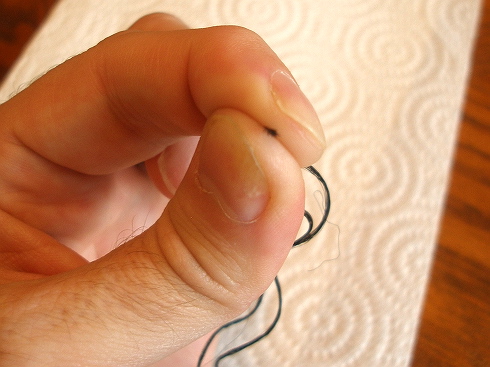
Step 2. Cut hair to thread through needle
In order to make threading the hair easier, I always grab some strands (usually 6-8 in length) of hair between my thumb and index finger and make a cut as close to my fingers as I can. This gives me a clump of compressed strands that are easier to work with. You dont need a lot of hair. I made the mistake on the first head I did of rooting in too much hair. 10-15 strands per hole will suffice in most circumstances.
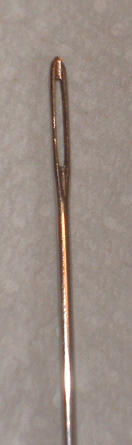
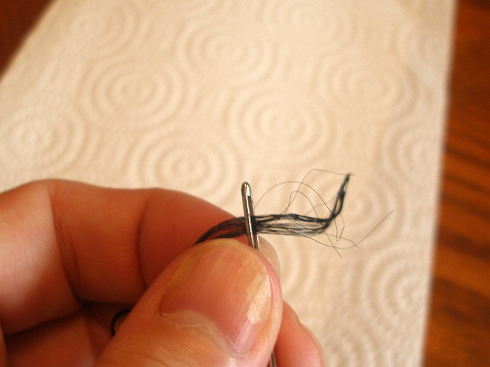
Step 3. Thread hair through eye of needle.
If youve cut the hair close to your fingers, threading is fairly easy. Its not uncommon for 1 or 2 strands not to go thru. Thats no big deal. If you find that a lot of your strands are not threading, you are probably either trying to thread too many hairs at once or not cutting the hairs close enough to your fingers.
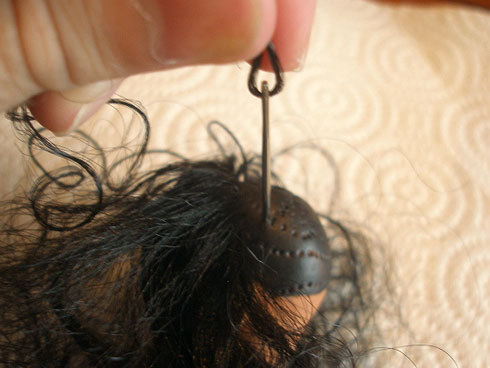
Step 4. Poke needle through hole in head.
I typically start at the left ear and work across to the right ear, going from front to back. The needle will go thru the existing hole without much trouble and poke out of the neck hole. I use my needle-nose pliers to pull the needle and hair the rest of the way thru. Once thru, I unthread the hair from the needle.
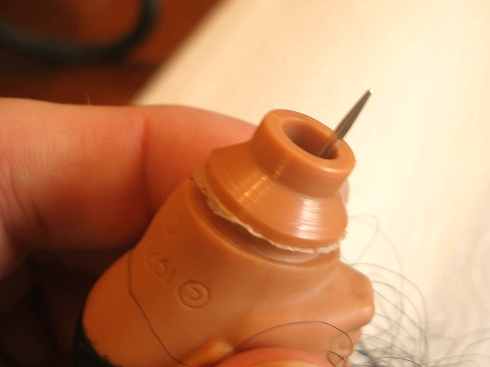
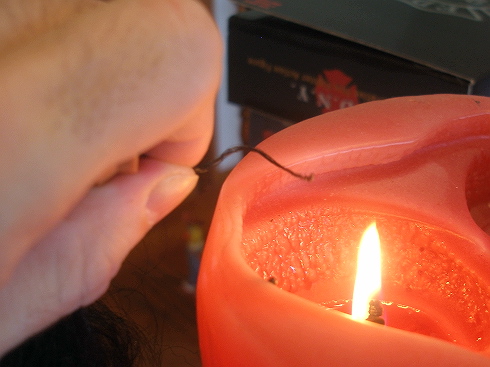
Step 5. Burn hair.
Take the stands of hair that you have pulled thru the head and carefully place the ends of them over an open candle flame. The doll/wig hair will melt fairly quickly congealing into a glob. This step takes a little practice, but as long as youre careful you should pick it up pretty easily.
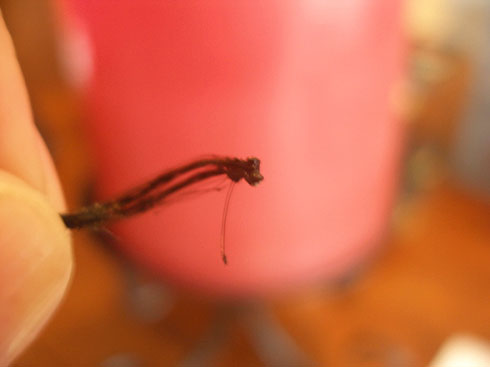
Step 6. Pull hair back through head
Grab the other end of the hair (the strands still sticking out of the top of the head and pull. The congealed blob of melted hair should be big enough so as not to pull thru the hole.
Step 7 - 999999
Repeat, repeat, repeat.
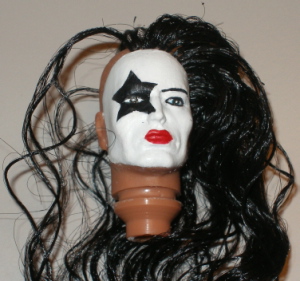
Next Step: Cut and style hair
I like to comb the hair out and then hold the rough style with a plastic band (the same hair bands that most rooted heads were originally shipped with). Boil some water and pour the boiling water into a shallow dish. Place the head in the water for several minutes. Pull the head out and place on some paper towels to dry. This will relax the hair enough to be styled.
When this step is over, you can glue up the slit in the back of the next plug and its as good as new.

Tips and Tricks
1. Once Ive plugged every hole of the front hairline, I paint the part of the head that will be covered by hair in a matching color. This will make the hair look fuller because no bald spots will show thru.
2. with the exception of the hair line (front and back), you dont have to fill every hole particularly in the back of the head.
3. After every 3-4 plugs, I comb the hair out. This prevents tangles and makes it easier to see new plugs as they are being rooted.